How do children make pumpkin seed crafts?
“Change your imagination to a more colorful one, the colors of autumn leaves should match it perfectly.”
Our last project was an autumn-themed one, involving Halloween decorations – specifically a scary pumpkin.
As I mentioned earlier, the pumpkin should not only be associated with Halloween, but also with the many benefits it has. https://littlepuzzlesandme.com/what-are-the-benefits-of-the-scary-pumpkin-design/
Our pumpkin seeds are a great food for birds. I eat them myself as a snack, or you can cook a delicious pumpkin cream.
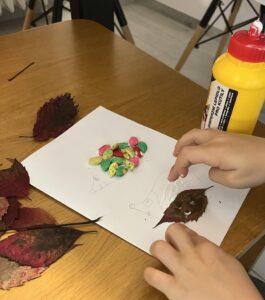
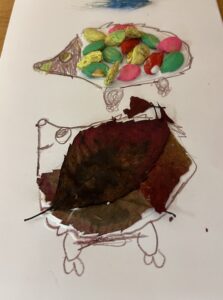
In today’s art, we will showcase another use of pumpkin seeds, namely in a decorative context. In the creative corner, my children are supposed to create a hedgehog out of pumpkin seeds and leaves. The autumn project, right?
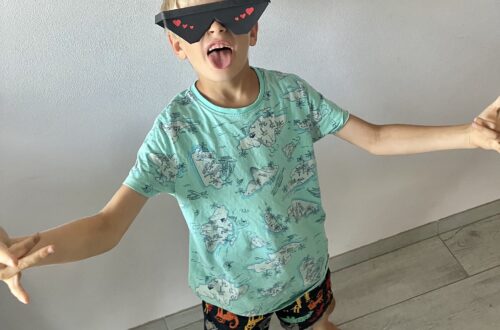
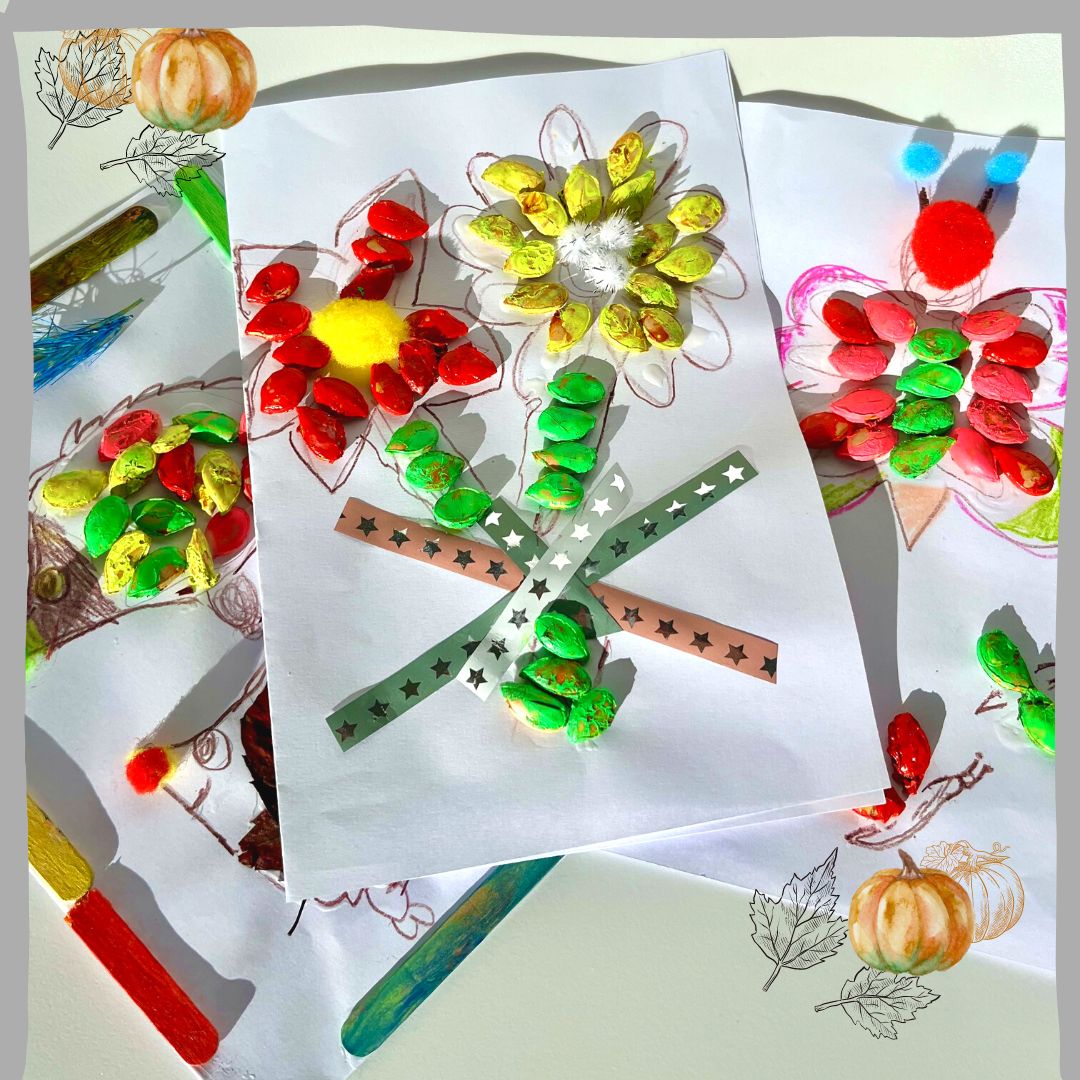
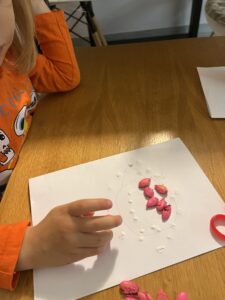
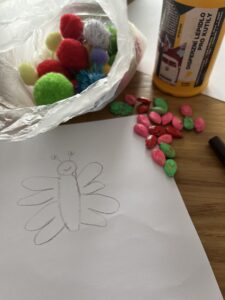
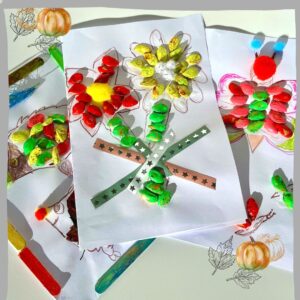
Dora was pleased with the hedgehog card design. While my son realized that his best friends, Emma and Ella (twins), are having a birthday, his design features birthday cards with flowers and butterflies. https://littlepuzzlesandme.com/how-to-make-a-card-that-will-melt-the-hearts-of-grandparents/
Not very autumnal. As you know, this is not my art; it is the art of “my little puzzles”, so as usual, I accepted my son’s idea in this case.
What little puzzles will be created today?
BIRTHDAY CARD from dry pumpkin seeds
What do my little puzzles not need?
DISTURBING PARENTS
We don’t cut too much when designing the cards, so Dora (a two-year-old girl) did everything herself. I drew only the sketches with a pencil (flowers, hedgehogs, butterflies) on which the children stuck pumpkin seeds. It was fun to see my 5-year-old boy with dedication and passion, stick dry pumpkin seeds on sketches of flowers, and Dora sticks pumpkin seeds in and out of the sketch.
What do my little puzzles need?
▪︎full stomach
▪︎drink near them
▪︎smile
▪︎patience-only because they create together
▪︎good energy
And everything on the list below:
☆tables cover
☆dry pumpkin seeds
☆crayons, paints, markers
☆food coloring(ours is gone and we use acrylic paints)
☆containers to sort seeds (playdough cups, yoghurt cups) or plastic zip bag
☆tray – on which the painted seeds will dry
☆fluffy soft pompoms
☆scissors
☆glue
☆ anything that will help your child embellish the card
What will we use for an unplanned mess?
☆ wet wipes
☆ kitchen paper
I will show you how easy the DIY card project from pumpkin seeds is:
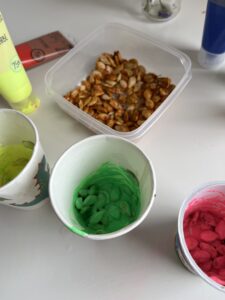
1. Paint the pumpkin seeds in your favorite color.
2. Use special containers such as play dough cups or plastic zip bags to separate the different colors of the wet pumpkin seeds.
TIPS:
*Better paint the day before and let the pumpkin seeds dry.
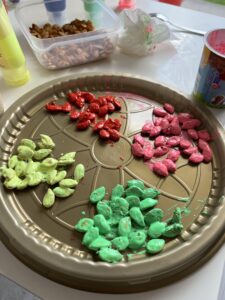
3. Divide all the colorful pumpkin seeds into small separate portions and place them on a tray.
4. Prepare sketches on the pieces of paper on which the children will stick the pumpkin seeds.
5. In places where there are sketches of flowers and butterflies, glue colored seeds. Choose your sketch suggestions.
6. Create your unique card in your style, colors, and visions.
7. Check out our photos that will help your child create.
PAINTING PUMPKIN SEEDS
LEAVE PUMPKIN SEEDS TO DRY
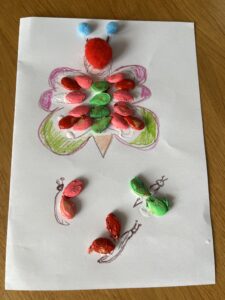
PREPARE CARD WITH HEDGEHOG – DORA PROJECT
DRAWING A SKETCH
GLUEING SEEDS, LEAVES
DORA’S HEDGEHOG CARD IS READY
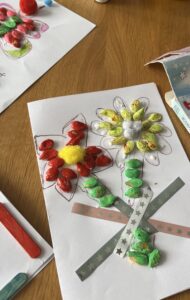
PREPARE BUTTERFLY CARD – PATRICK PROJECT
DRAWING A SKETCH
GLUES SEEDS
PATRICK’S FLOWERS AND BUTTERFLY CARDS ARE READY


You May Also Like
How the children made a jumping bunny out of paper?

How do children create decorations for light switches?