How do children make colorful umbrellas?
“I prefer living in color.”
David Hockney
In our wonderful, tiny mountain village ( Frydlant nad Ostravici ) we have the return of winter, there is a lot of snow and it is still falling. My children ask me every time the frost and snow return, will it be Christmas again? The Christmas tree in their room is still up, so it seems like Christmas never stopped.
I spend a lot of time outside with the kids and maybe we would spend more, but it gets gray and gloomy so quickly. Our mornings are no longer with beautiful sun, but with snow. Every January day we miss this sun and colors, but we never run out of colorful DIY ideas.
In the creative corner, there will be colorful handicrafts, but also very simple ones for the youngest (my Dora is 2 years old). As with most of my “little puzzles” projects, we will use materials that we have in the cupboard.https://littlepuzzlesandme.com/what-decorations-do-children-create-from-dried-flowers/
What little puzzles will be created today?
COLOURFUL UMBRELLAS
What my little puzzles don’t need?
DISTURBING PARENTS
I helped Dorothy with cutting paper circles and Patrick with gluing the straw to the paper circles. Dora is always happy to use glue herself and she did in this project too, but she often glues her fingers and everything around. Patrick was doing much better, but he is 5 and Dora is only 2.
What do my little puzzles need?
▪︎full stomach
▪︎drink near to them
▪︎smile
▪︎chill out music
▪︎good energy
And everything on the list below:
☆tables cover
☆colouring paper or construction paper
☆pencil
☆glue
☆scissor
☆plastic cup (to draw the shape of the circles)
☆ straw
☆ everything that will help your child make the DIY UMBRELLA PROJECT look unique
What will we use for an unplanned mess?
☆ wet wipes
☆ kitchen paper
Step-by-step process of making COLORFUL UMBRELLA:
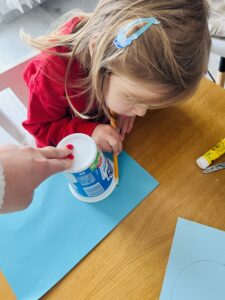
1. Draw the shapes of the circles from the plastic cups.
TIPS:
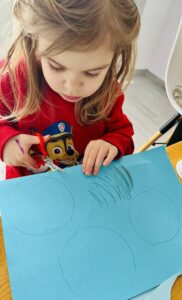
Small circles are more difficult to cut and glue for small children, so we used quite large – 5 centimetres.
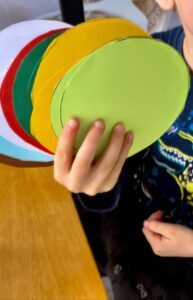
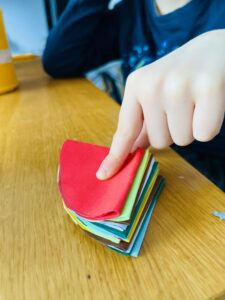
2. Cut out all the circles. 15 pieces, we cut, but you can do less, certainly not more.
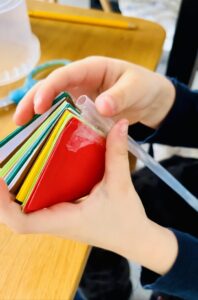
3. Fold the circles in half and glue them inside.
4. Glue the halves of the circle together (15 halves).
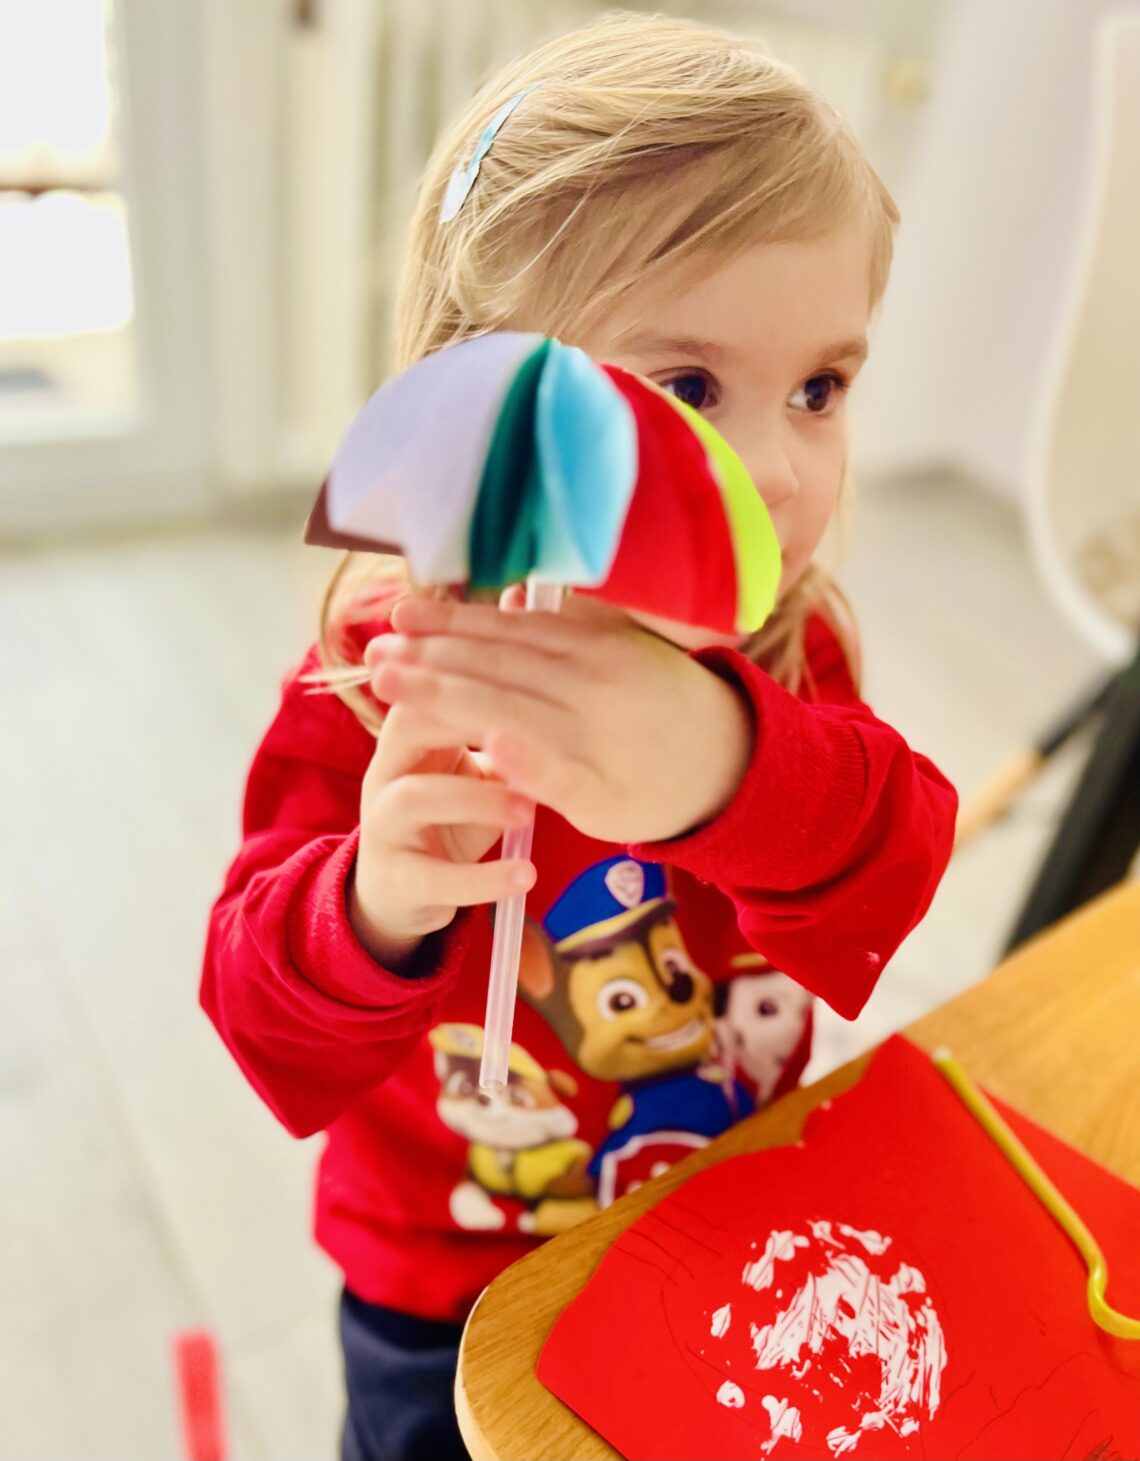
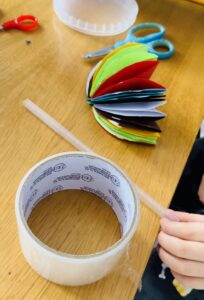
5. Use adhesive tape to attach the straw to the halves of the circles.
6. Make and add more details to your umbrella like glitter, colorful stickers, etc.
7. Check out our photos below and more of our DIY projects in video clips at https://www.instagram.com/missmarbell_/
DRAW THE SHAPE OF THE CIRCLES

CUT OUT ALL OF THE CIRCLES
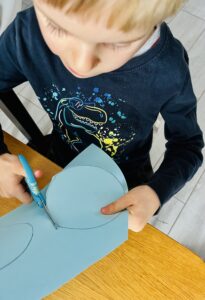
FOLD THE CIRCLES IN HALF
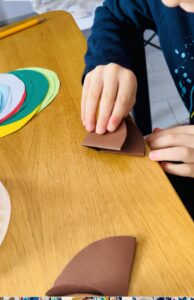
GLUE THE CIRCLES INSIDE

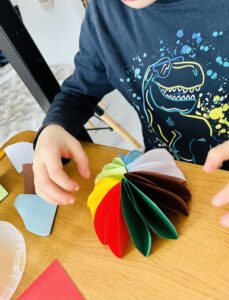
GLUE ALL HALF OF THE CIRCLES TOGETHER
USE ADHESIVE TAPE TO ATTACH THE STRAW
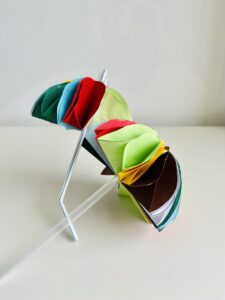
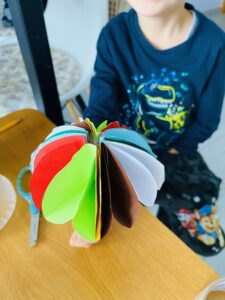
COLORFUL UMBRELLAS ARE READY


2 Comments
Pingback:
Pingback: