How do children create funny frog with pop-up tongue?
“When you have kids, your house is still decorated a month after Christmas or more.”
You can still feel the Christmas atmosphere in my house. Christmas decorations made by children are still on all the shelves. New Year’s Eve time stays in every room. Balloons are hanging in the corners or rolling on the floor because they fell.
I know it’s time to take off those ornaments, but my kids say otherwise. Yesterday, for example, they brought from school jars covered with fake snow. And my every attempt to bury their Christmas masterpieces ends in a fiasco.
I think Christmas feeling will stay with us until spring. And when it comes to spring, I managed to convince the children to do a few handicrafts that will be associated with spring. First, we’ll make the frogs. This DIY project is easy to make for children 2-5 years old, it looks nice, amuses and you can really have fun with it.
What little puzzles will be created today?
A FROG WITH POP OUT TONGUE
What my little puzzles don’t need?
DISTURBING PARENTS
I show my kids how to roll a frog’s tongue. Patrick (5 years old) could do it himself. Dora (2 years old) is now at the stage where she wants to do everything herself. Most of the time she can’t. She gets angry and left the creative corner earlier.
What do my little puzzles need?
- full stomach
- drink near to them
- smile
- patience – only because they create together
- good energy
And everything from the list below:
☆acrylic paints or markers
☆tables cover
☆paper cup (to draw the shape of the eye)
☆plastic bowl (to draw the shape of the frog’s head)
☆adhesive tape
☆coloured paper or construction paper
☆straw
☆scissors
☆glue
☆pencil (to better roll up the frog’s tongue)
☆anything that will help your children to create a more beautiful frog
What will we use for an unplanned mess?
- wet wipes
- kitchen paper rolls
Step-by-step process of making A FROG WITH POP OUT TONGUE :
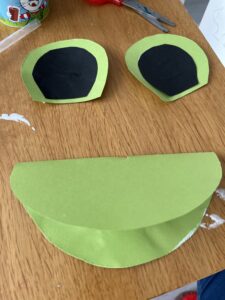
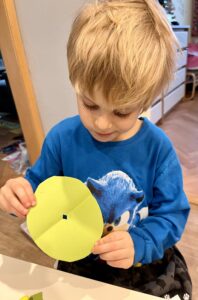
1. Cut out the shape of the frog’s head and the frog’s eyes from the prepared sketch.
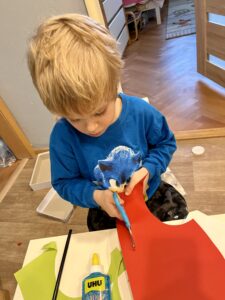
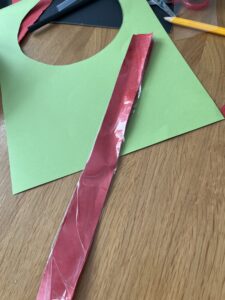
3. Cut two strips of paper for the frog’s tongue.
4. Stick strips of tape on both sides of the paper tongue.
TIPS:
*precisely stick the two strips of paper together, the holes make it difficult to blow air out.
*don’t glue one end of the strip, this will be a free place for the straw.
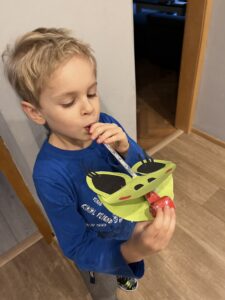
5. Put a piece of straw into the paper tongue.
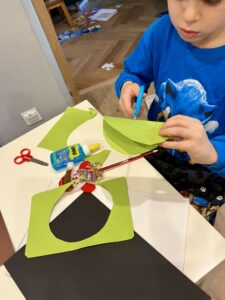
6. Make a small hole in the center of the frog’s head.
7. Insert the paper tongue into the prepared hole in the frog.
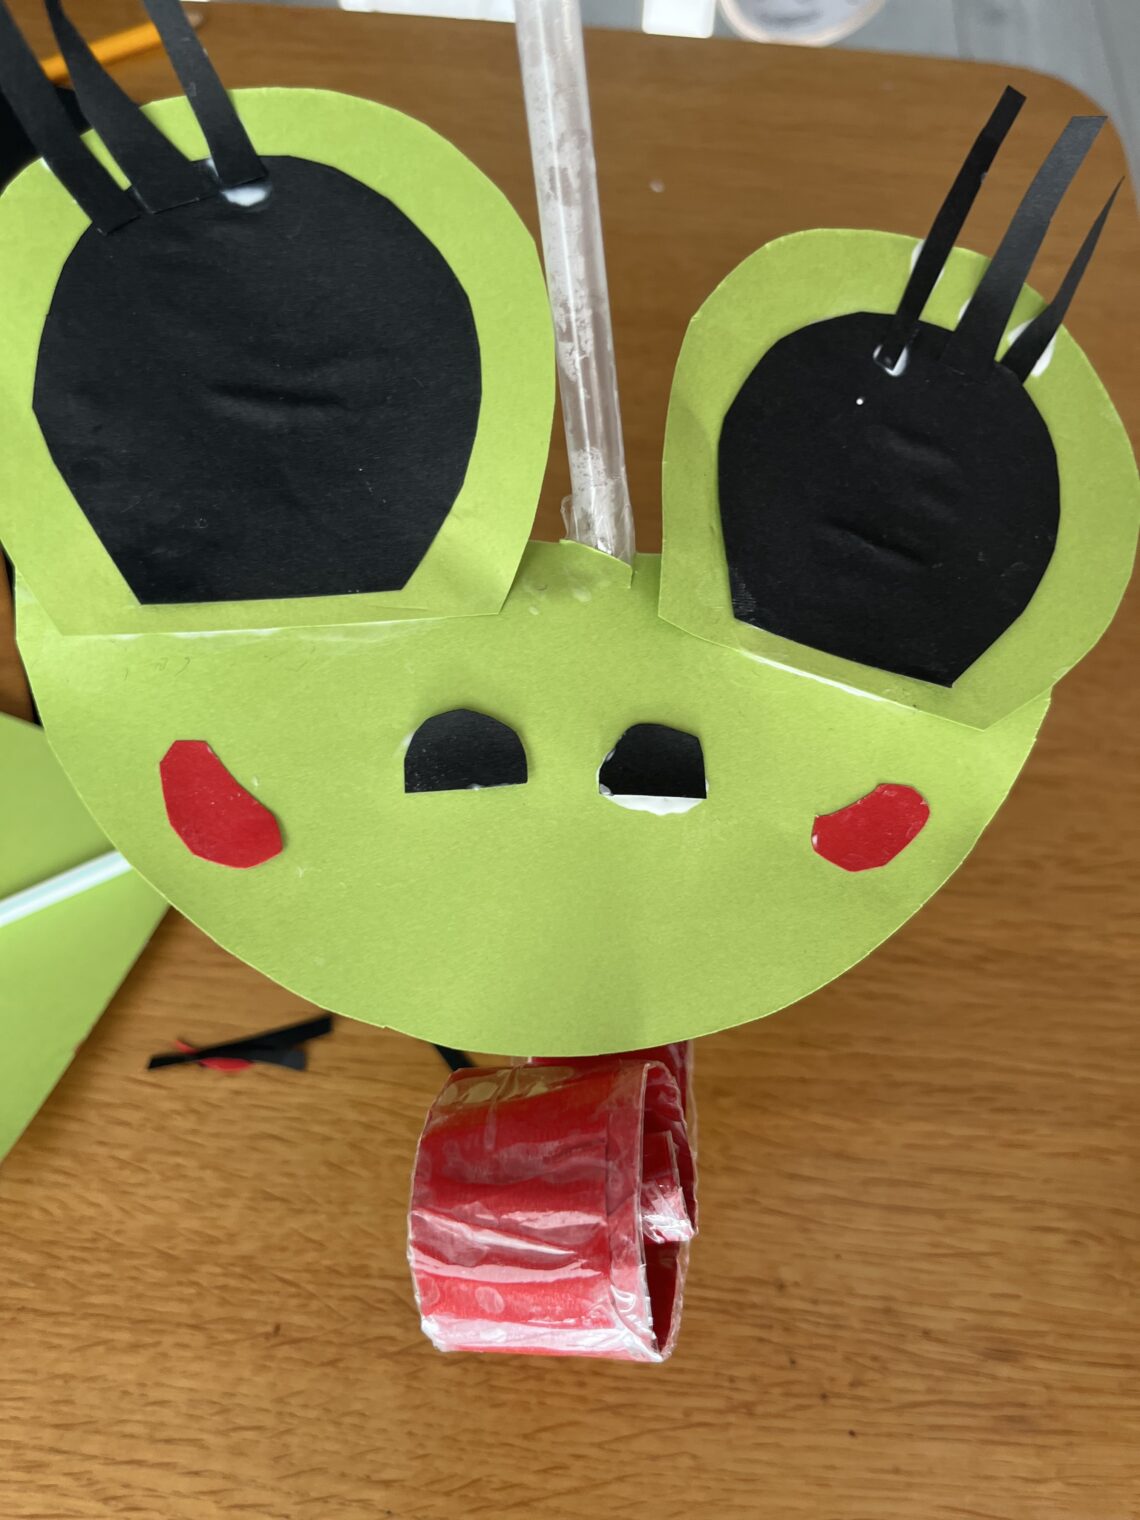
8. Glue or paint all the details of the frog (eyes, nose, leg, etc.)
TIPS:
*leave your children alone to create a unique design.
9. Check out our photos that will help your child with creation. And more DIY projects on Instagram https://www.instagram.com/missmarbell_
CUT OUT THE SHAPE OF THE FROG’S HEAD
CUT OUT THE SHAPE OF THE FROG’S EYES
CUT TWO STRIPS OF PAPER FOR THE FROG’S TONGUE
STICK STRIPS OF TAPE ON BOTH SIDES OF THE PAPER TONGUE
PUT A PIECE OF STRAW INTO THE PAPER TONGUE

MAKE A SMALL HOLE IN THE CENTER OF THE FROG’S HEAD
INSERT THE PAPER TONGUE INTO HOLE IN THE FROG

A FROG WITH A POP-UP TONGUE IS READY


2 Comments
Pingback:
Pingback: