How do children make Christmas trees from pine cones?
“Good art is not what it looks like but what it does to us”.
– Roy Adzak
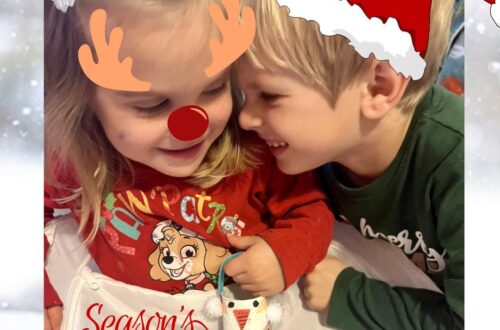
My little puzzles and I took a trip to the forest to collect nature’s beautiful gifts – pine cones, for our Christmas projects. Then we went with my son to his favorite decorating store. We purchased everything we needed to create our DIY art, including additional glues, paints, glitter, strings, pom-poms, and colored paper. When my son picks glitter colors, I notice a lot of Christmas stuff around. I stopped next to the shelf with front door decorations. These door decorations are made of plastic, green Christmas tree branches with plastic bells and snow. Seemingly nice, but not particularly genuine and evoking no strong feelings. Didn’t impress me.
Another thing that surprised me was the availability of plastic pine cones in various colors. Here, I experienced a double shock – the price and the quality of this decoration. Even my son looked surprised and asked:
“They brought it from the forest?”
“Nope.”
“But we have pine cones from the forest.”
“Yes, I know”.
“We will sell ours too?”
“We will not, we will paint them, decorate them, and create our own Christmas decorations”.
And then it started. “My Little Puzzles” decided to create the first small Christmas trees from pine cones. On my website, you will find many simple Christmas projects for kids. https://littlepuzzlesandme.com/what-christmas-decorations-do-children-make-from-rolls-of-paper/
I am happy if you want to copy our idea and share it with your friends or family later. https://littlepuzzlesandme.com/what-christmas-decorations-do-my-children-make-from-popsicle-sticks/
I also recommend a little walk in the woods to choose the most beautiful cones for a DIY Christmas tree project.
What little puzzles will be created today?
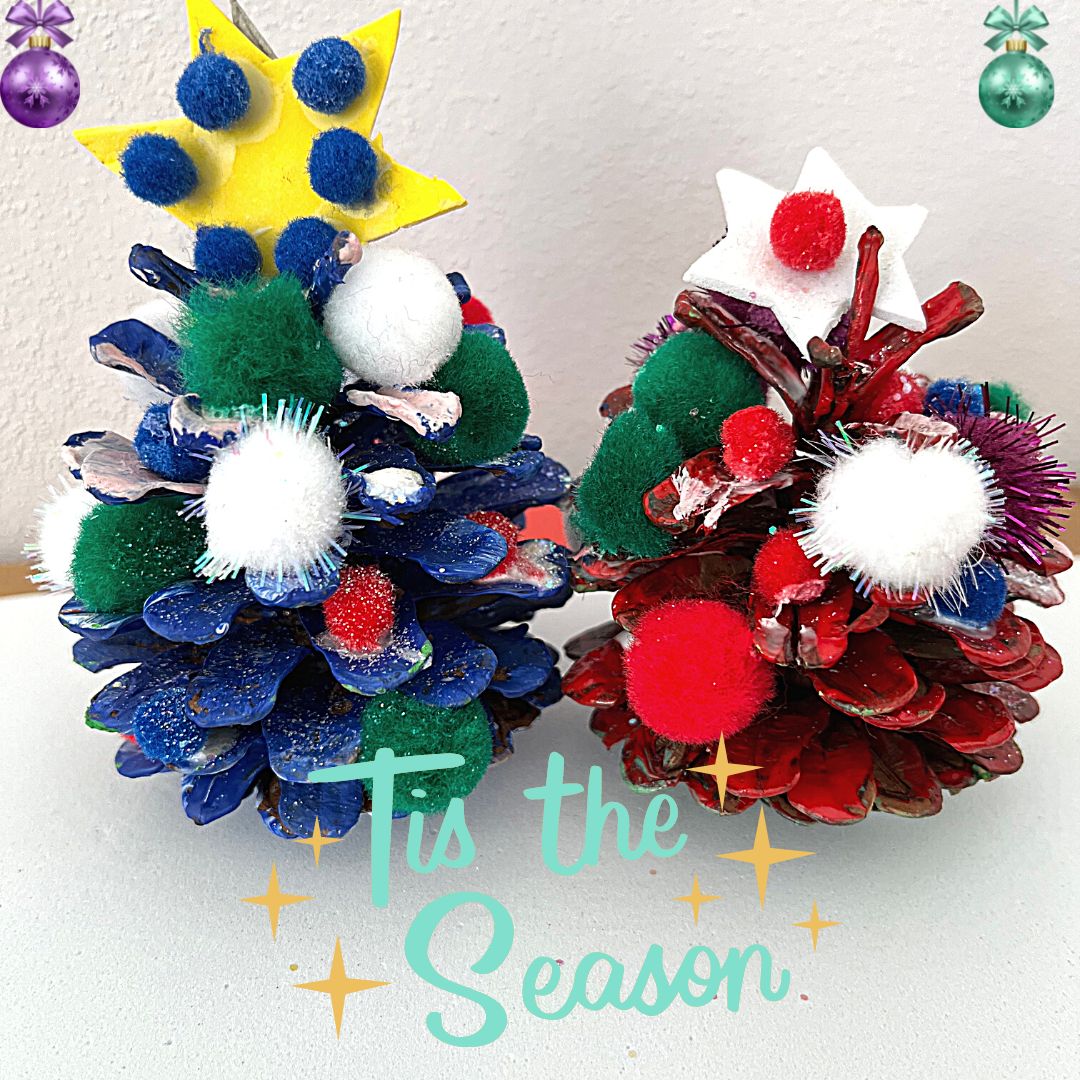
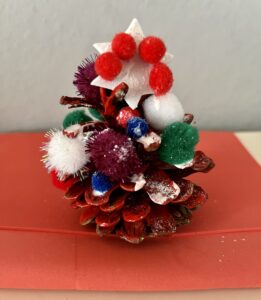
CHRISTMAS TREE from pine cones
What do my little puzzles not need?
DISTURBING PARENTS
This art is definitely wonderful when children create it together. It is also so easy to do for the little ones. Unfortunately, it is extremely dirty because the painting of the cones ends up with painted hands, clothes, and everything around.
What do my little puzzles need?
▪︎full stomach
▪︎drink near to them
▪︎smile
▪︎patience-only because they create together
▪︎good energy
And everything on the list below:
☆tables cover
☆acrylic paints, markers, crayons
☆fluffy soft pom-poms
☆glitter
☆coloured construction paper
☆scissors
☆glue
☆ anything that will help your child make a unique Christmas tree design
What will we use for an unplanned mess?
☆ wet wipes
☆ kitchen paper
Let’s start the process of creating a Christmas tree from pine cones:
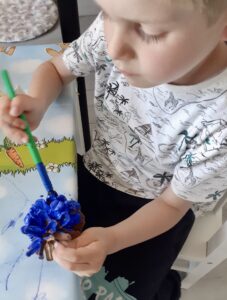
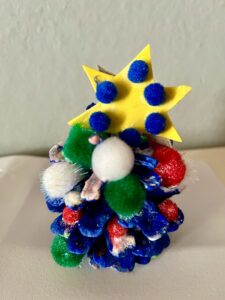
1. Paint the pine cones in your favorite color. We should choose green and red colors to reflect the magic of Christmas, but Patrick’s favorite color is blue, and the cones will be blue.
2. Leave the pine cones to dry.
TIPS:
*Better paint the day before and let the pine cones dry.
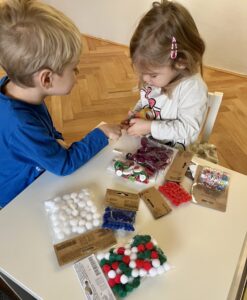
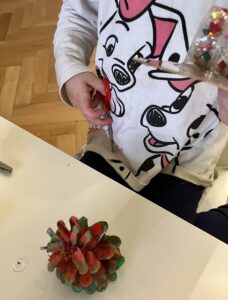
3. While the painted cone dries, prepare the products you want to use for decoration:
– colorful pom poms – smaller, better
– colorful construction paper, for making a Christmas star
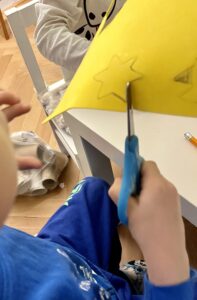
4. The parent will help you sketch the star.
5. Cut the shape of a Christmas star.
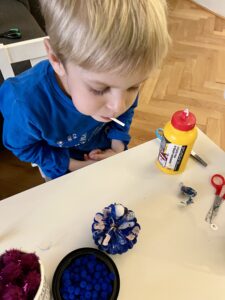
6. Glue pom poms and stars to cones.
7. Use glitter to give decorations a Christmas look.
8. See our photos, which show the step-by-step process of making decorations.
PAINTING PINE CONES

PREPARING ITEMS FOR ART
DRAWING THE SHAPE OF A STAR

CUTTING THE SHAPE OF A STAR
GLUEING THE POM POMS
CHRISTMAS TREE FROM PINE CONES READY


You May Also Like
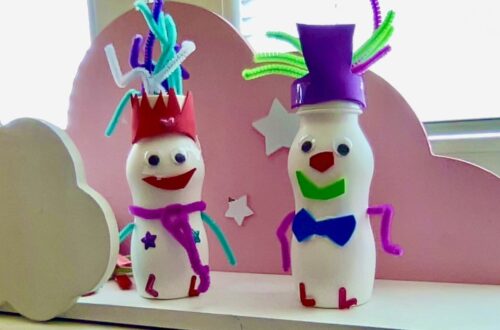
How do children create funny characters from yogurt bottles?

What Christmas decorations do my children make from popsicle sticks?