What Halloween projects do my children create?
“IMAGINE, CREATE AND TERRIFY OTHERS”
I love any occasion when my kids can do DIY projects. Of course, mainly in my children’s projects, they use acrylic paint, glues, or my daughter’s favourite – glitter. It has to be “my little puzzles” art with paint stains all around and dripping glue on the floor. Therefore, using our DIY ideas, please stock up with:
table cover, wet wipes, kitchen paper, and toxin-free acrylic paint that is easy to remove.
As some already know, in DIY lessons, we use cheap and easily recyclable products. Since we’ve already created various works of art with toilet rolls, we’ll use them again this time. It’s very easy to create multiple characters and toys with this material. https://littlepuzzlesandme.com/how-children-create-octopus-family-from-toilet-paper-rolls
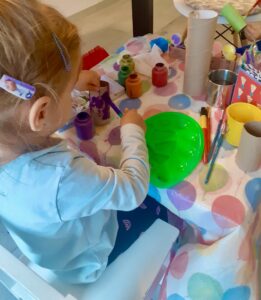
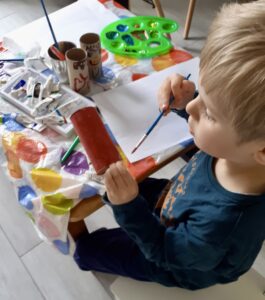
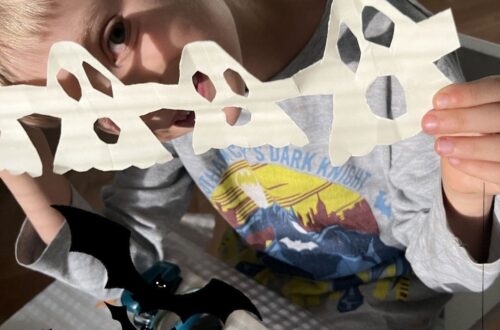
Little ones can handle any DIY project involving toilet rolls. My two-year-old daughter has great fun painting the rolls and sprinkling them with glitter. Patrick prefers to add details and create projects like a Minion holder (https://littlepuzzlesandme.com/how-children-make-pencil-holder-from-toilet-paper-rolls/) or Halloween creatures.
With great pleasure, I look at “my little puzzles” and recognize their progress in all the various art projects. Stained tables, walls, or floors don’t worry me too much. I can always clean up children’s hands, clothes, and sometimes their hair, which is stained with paint, as well.
Soon, you will notice that the idea of a creative children’s corner brings numerous positive effects on children’s development, as well as long-awaited moments of peace for you.
I would be lying if I wrote that we prepared only one Halloween project in the creative corner. Every weekend in October, my kids were very excited to make more Halloween decorations.
https://littlepuzzlesandme.com/what-kind-of-halloween-scary-project-will-little-kids-create/
https://littlepuzzlesandme.com/how-to-make-a-spider-that-scares-grannies/
Today, we decided to share some DIY projects using toilet paper rolls.
What little puzzles will be created today?
HALLOWEEN SPOOKY ART from toilet paper rolls
What do my little puzzles not need?
DISTURBING PARENTS
My little puzzles create unique projects without help. Let yourself be surprised.
What do my little puzzles need?
- full stomach
- drink near them
- smile
- patience – only because they create together
- good energy
And everything from the list below:
☆tables cover
☆toilet paper rolls
☆scissors
☆glue
☆acrylic paints or markers
☆plastic wiggly eyes stickers
☆coloured paper or construction paper
☆anything that will help your kids better decorate spooky Halloween monsters
What will we use for an unplanned mess?
- wet wipes
- kitchen paper rolls
Let’s start the process of creating a scary Halloween design together:
1. Paint the toilet paper roll. More painted rolls are more fun.
TIPS:
*use as little water as possible for the paints.
*allow the painted toilet rolls to dry.
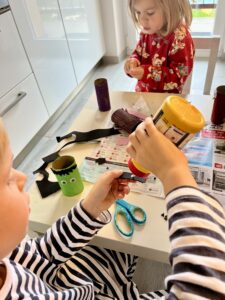
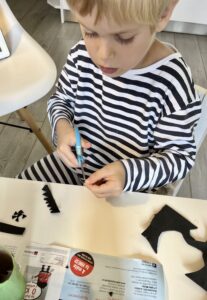
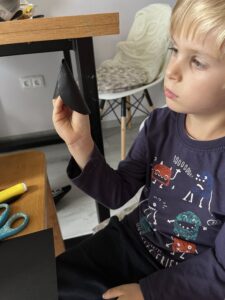
2. You can cut wings, teeth, eyes, or other necessary details while drying rolls.
3. Glue all the prepared details.
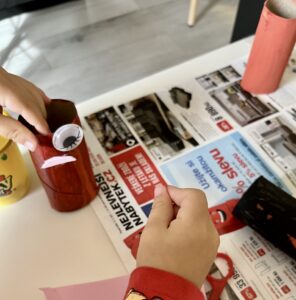
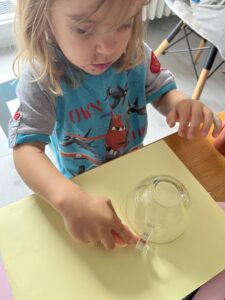
4. Add wiggly eyes.
TIPS:
*leave your children alone to create a unique design.
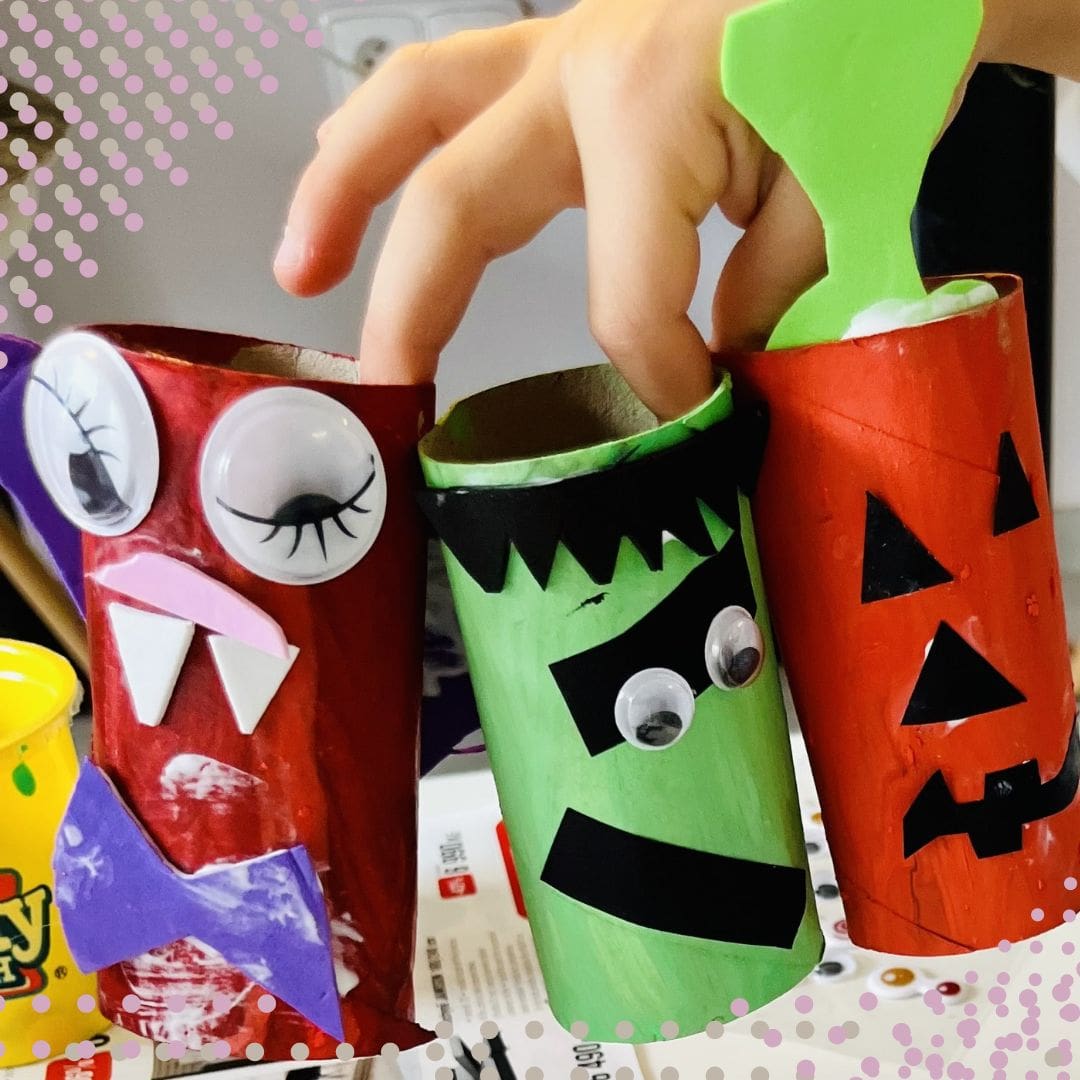
5. Check out our photos that will help your child with creation.
PAINTING TOILET PAPER ROLLS
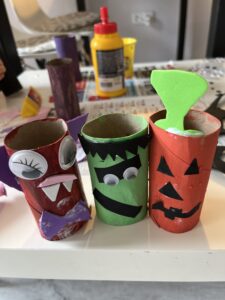
ADDING DETAILS TO THE FRANKENSTEIN PROJECT
WIGGLY EYES FOR DRACULA PROJECT
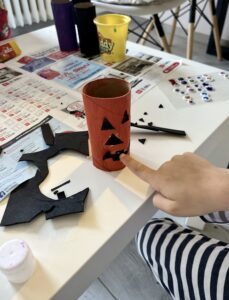
ADD DETAILS TO SCARY PUMPKIN PROJECT
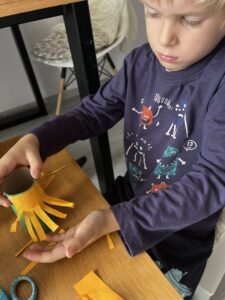
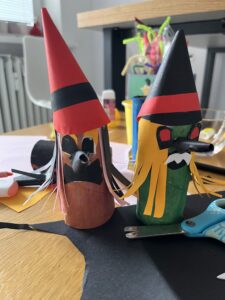
MAKING THE WITCH’S HAIR

PREPARING THE SHAPE OF A WITCH’S HAT
SPOOKY CHARACTERS FOR HALLOWEEN


2 Comments
Pingback:
Pingback: